License Plate Recognition (LPR)
License Plate Recognition (LPR) is technology used to automatically read and interpret vehicle license plates. This guide walks through opening the LPR application in App Stack, configuring devices and ROIs, and setting Meta Parameters for a typical deployment.
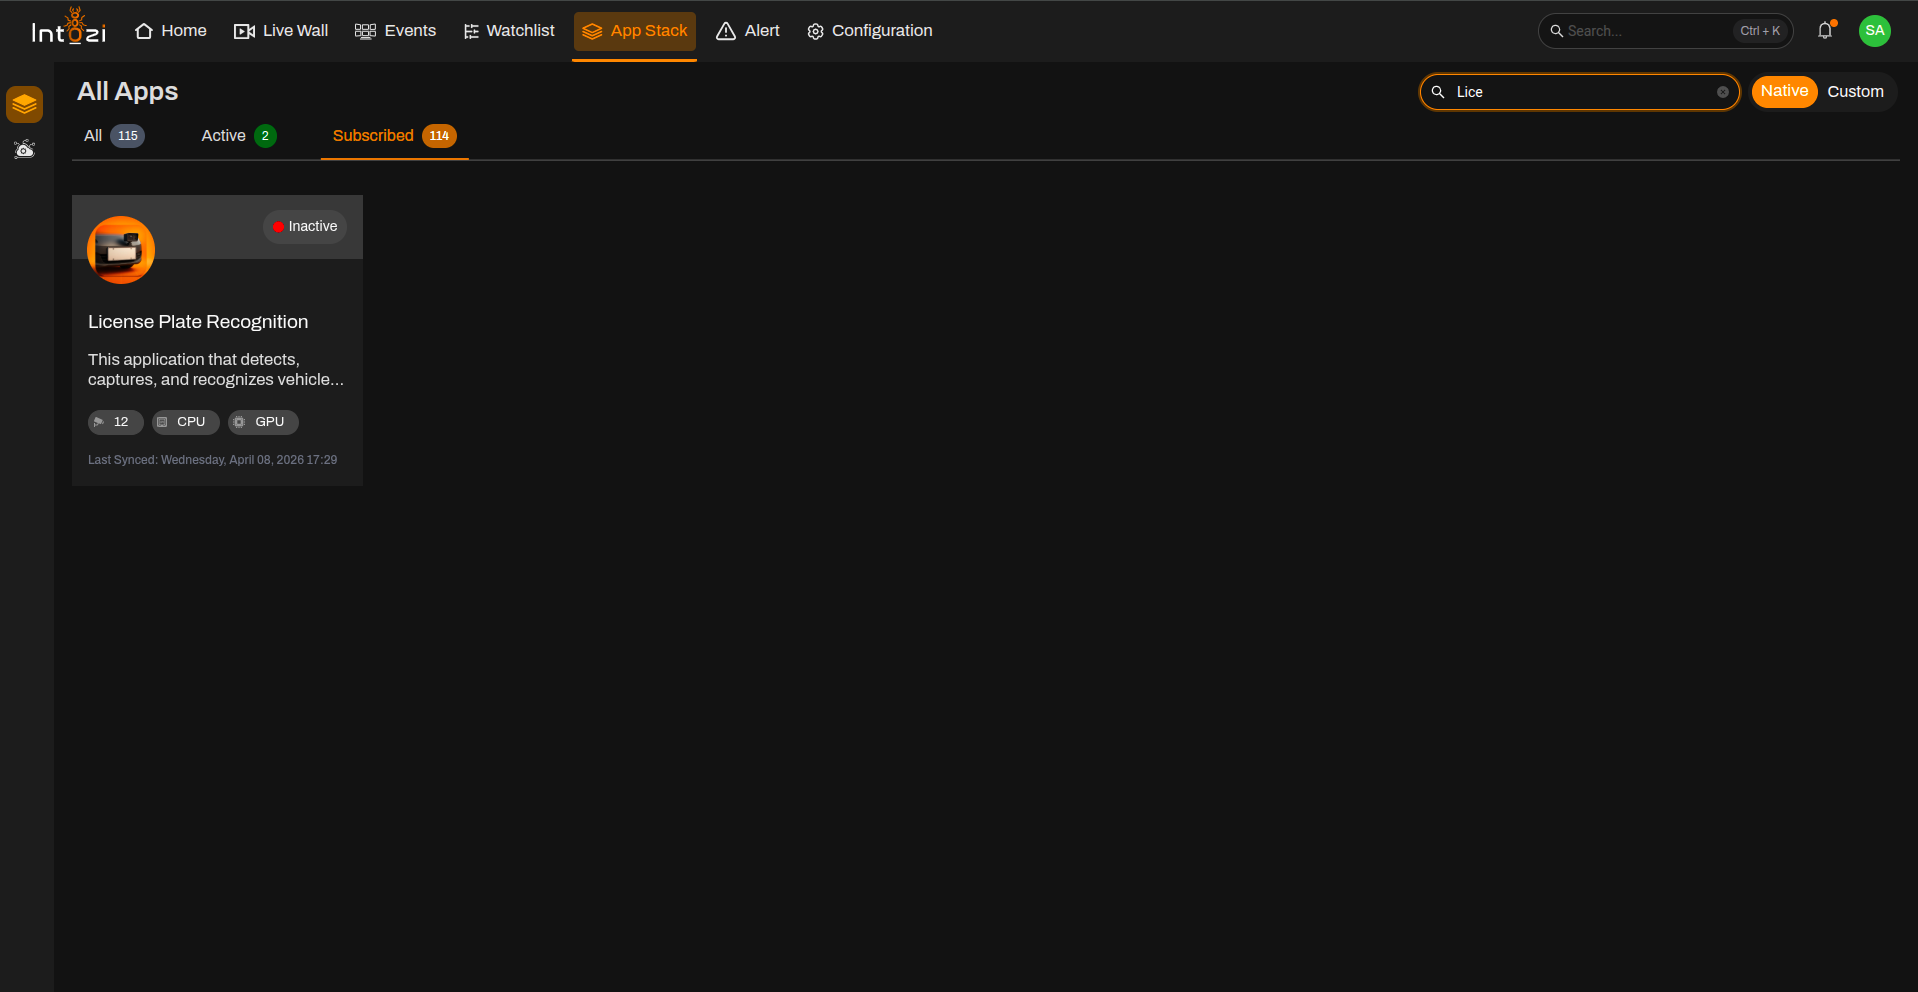
1. Finding the LPR Application in App Stack
- Open App Stack on the platform.
- Use the search bar (usually at the top right of the dashboard).
- Enter License Plate Recognition (or LPR).
In the results, click once on the application to open it.
2. Device Configuration
After the application opens, you are taken to the Device Configuration page.
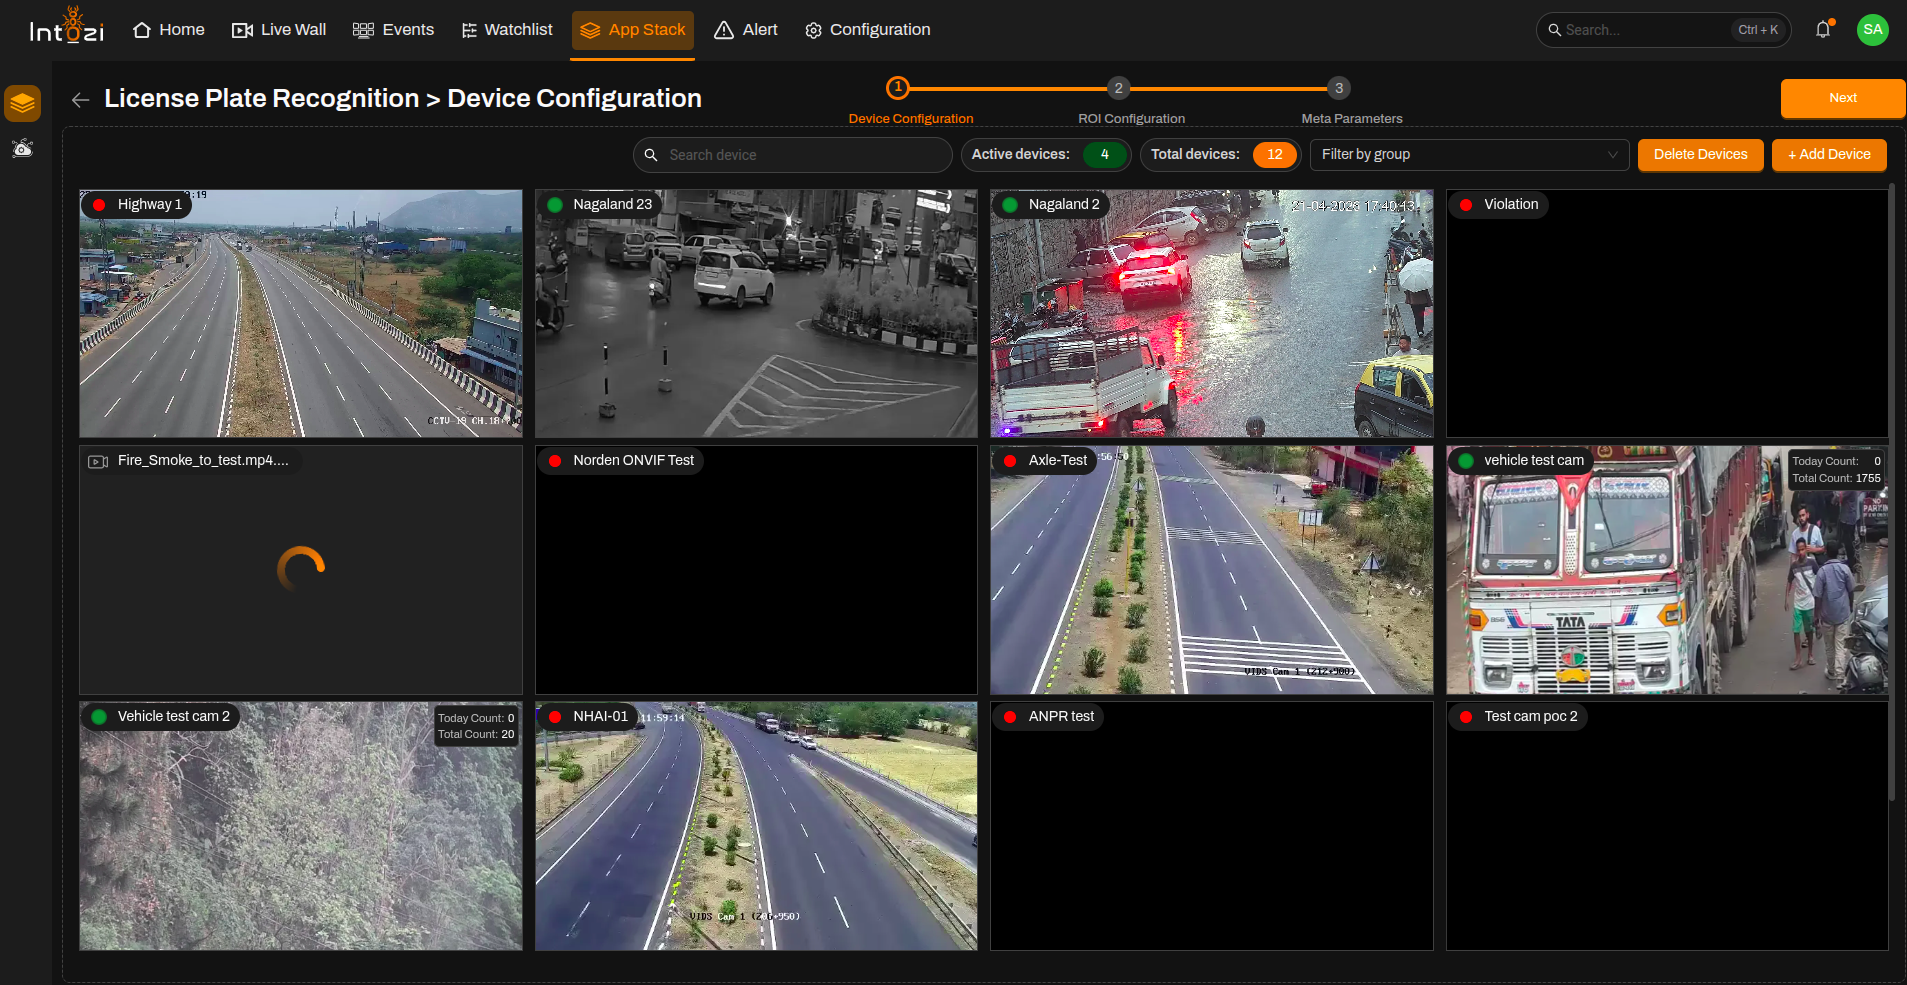
- On the right side of the page, use the option to add a device and connect the cameras you need.
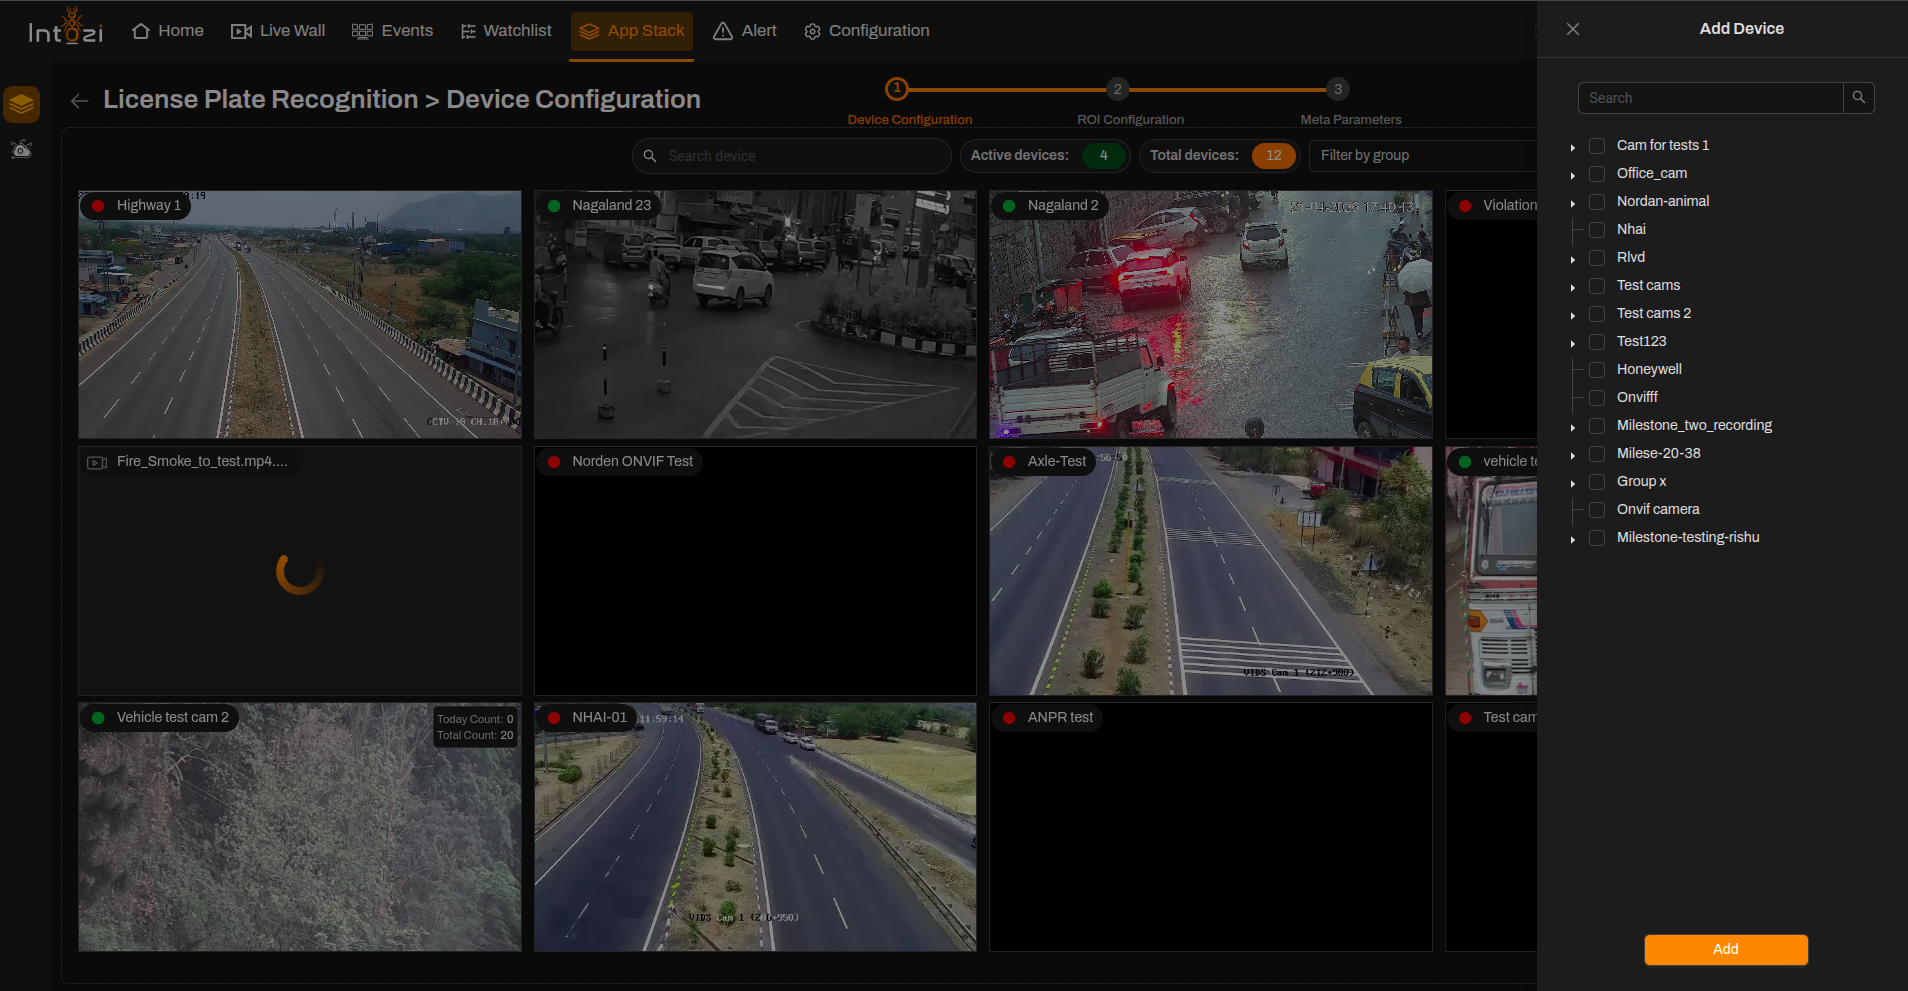
- When finished, continue to the next step (ROI Configuration).
3. ROI (Region of Interest) Configuration
Ensure all required cameras are connected properly before proceeding to ROI configuration.
All devices you added on the device configuration step appear here so you can draw ROIs on the correct feeds.
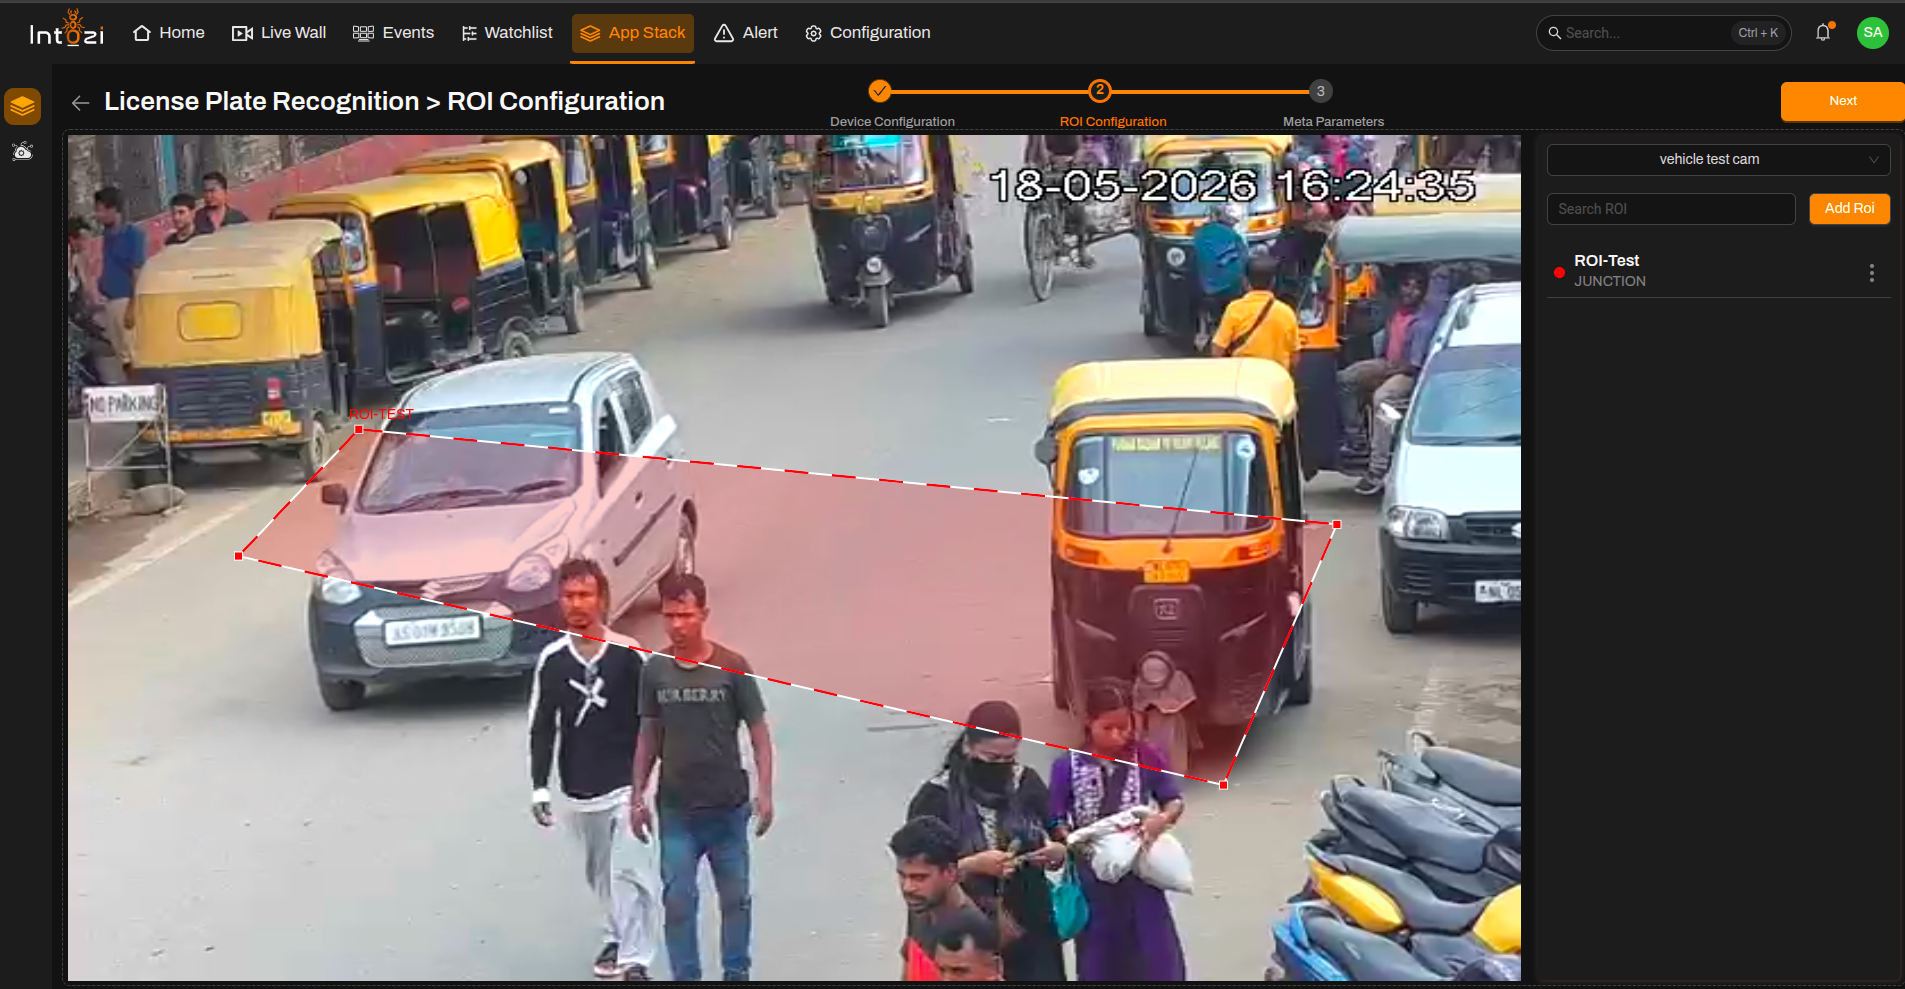
- Select the device you want to configure.
- Click Add ROI (top right of the ROI Configuration page).
- Fill in the ROI details:
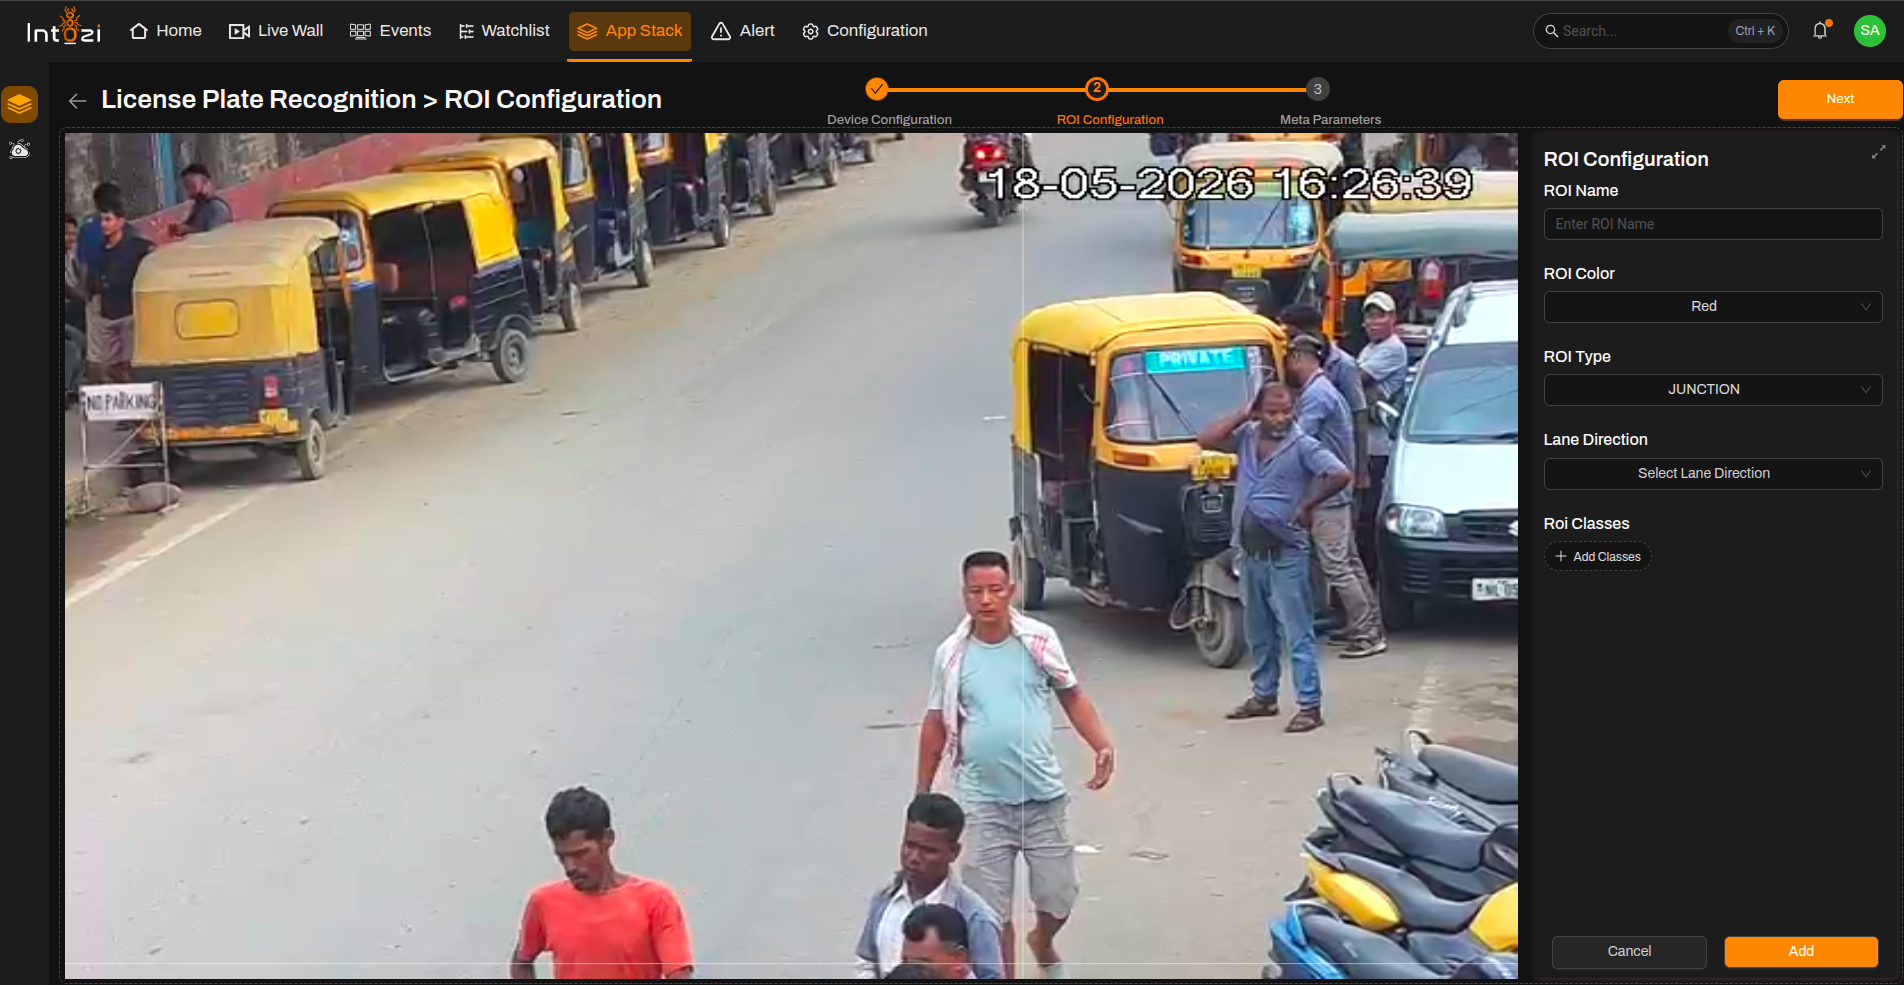
| Field | Guidance for LPR |
|---|---|
| ROI Name | Enter a clear name for the region. |
| ROI Color | Pick a color to distinguish this ROI on the video. |
| ROI Type | For LPR, select Junction. |
| Lane Direction | Set to None. |
| ROI Classes | Not required for LPR. |
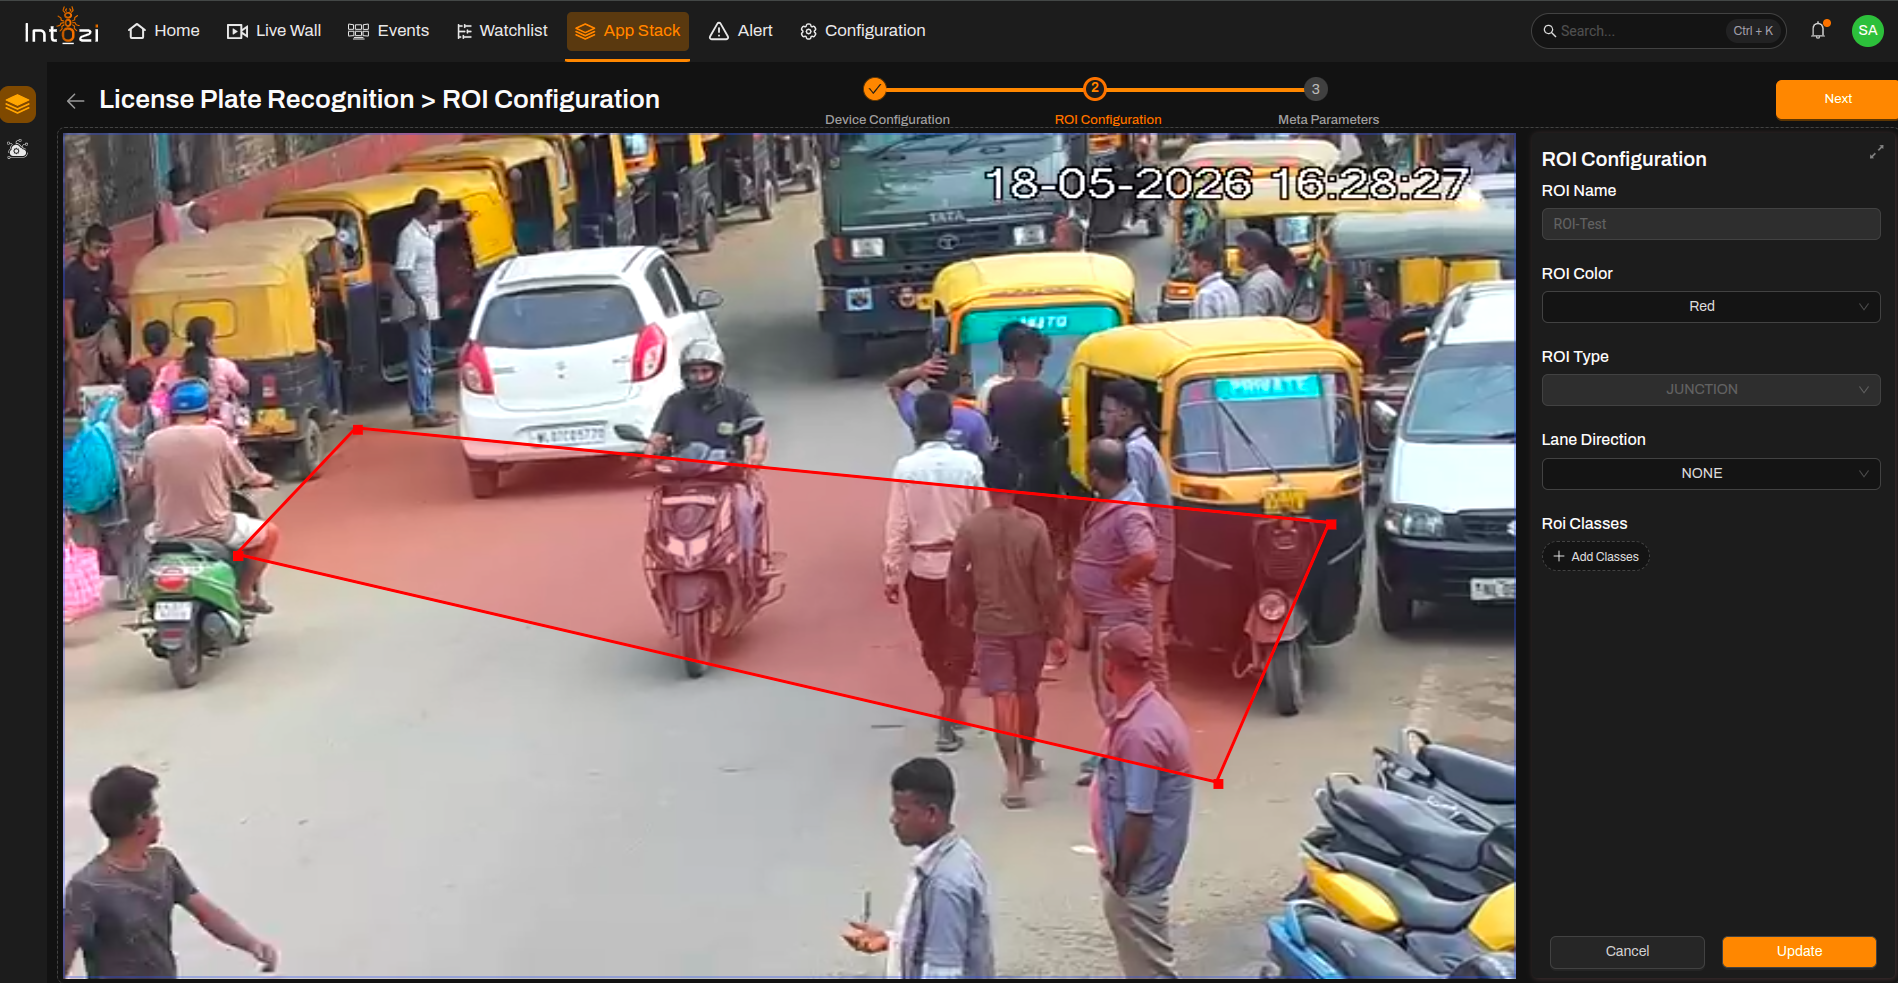
Note: You can update or delete an ROI by selecting it and using the corresponding actions.
4. Meta Parameters Configuration
After ROI setup, open the Meta Parameters page.
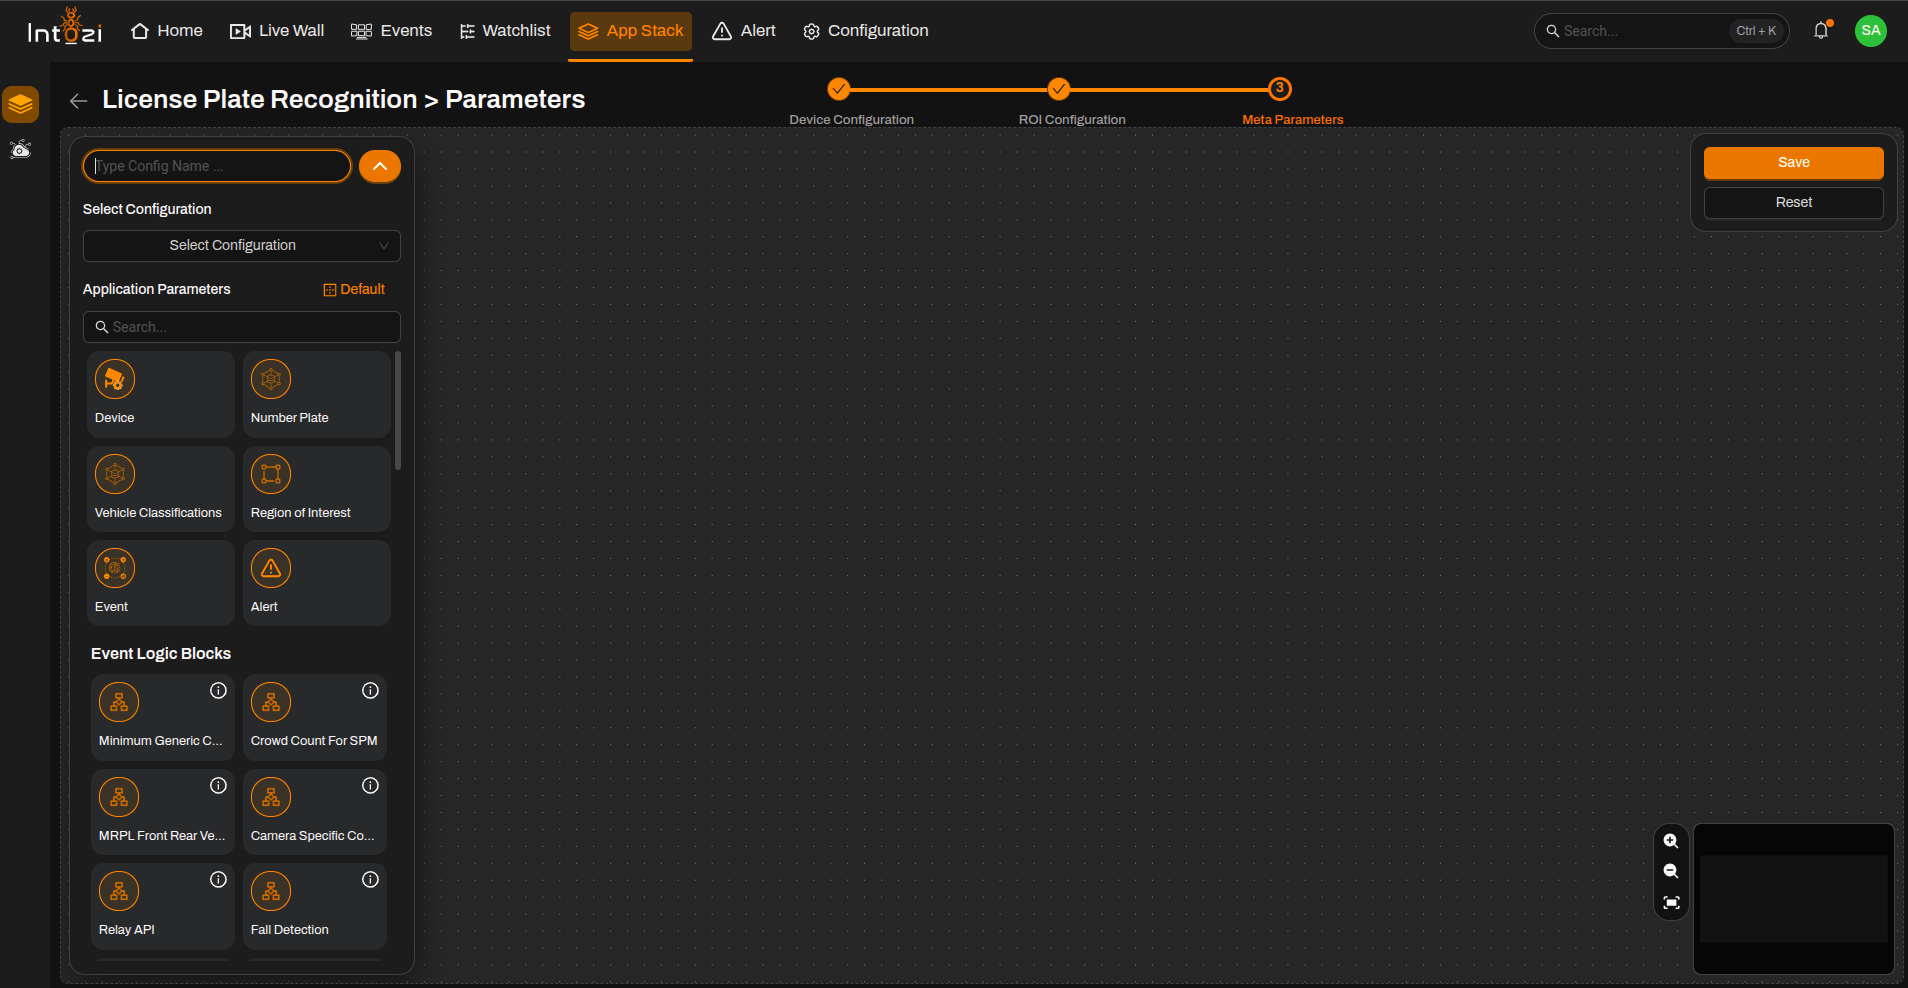
4.1 Default vs. custom configuration
You can either:
- Use a default configuration, or
- Create a new custom configuration.
A default configuration typically includes these modules in the flow:
- Device
- Number Plate
- Region of Interest (ROI)
- Event
- Alert
4.2 Device module
- Select the camera to use.
Available settings include:
- Direction
- Vehicle Class
- In/Out Direction
Note: Set Vehicle Class to 1 only if vehicle classification is required; otherwise leave parameters at their defaults.
4.3 Number plate confidence
- The default confidence value is 0.45.
- Adjust if needed based on the camera's field of view and scene conditions.
4.4 Final configuration
- Enter a name for this configuration.
- Choose hardware type (CPU or GPU) to match your server.
- Adjust batch size if your operations or CV team recommend it.
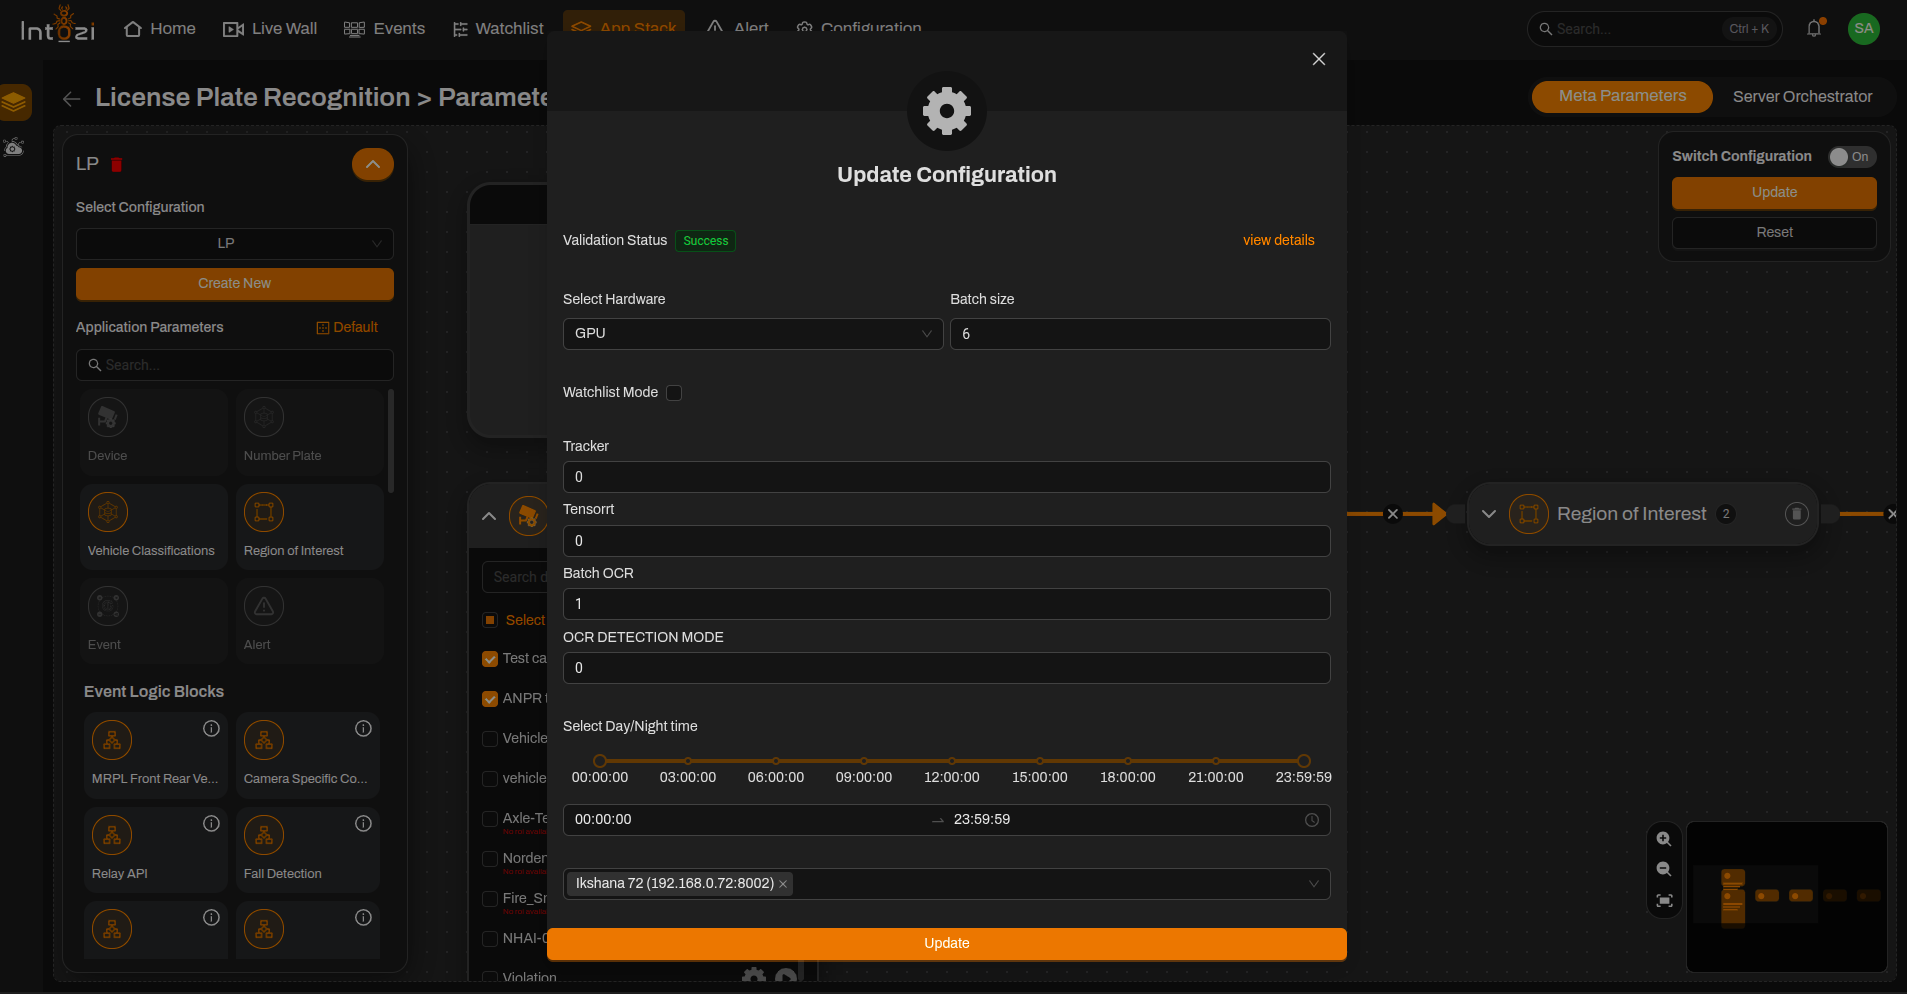
After selecting hardware and batch size, additional advanced options may appear:
Tracker selection
| Value | Option |
|---|---|
| 0 | Norfair Tracker |
| 1 | ByteTracker |
TensorRT configuration
| Value | Option |
|---|---|
| 0 | Disabled (typical for x86 systems) |
| 1 | Enabled (e.g. NVIDIA Orin devices) |
TensorRT is mainly for performance on supported NVIDIA hardware. For standard x86 systems, 0 (disabled) is usually appropriate.
Batch OCR setting
| Value | Behavior |
|---|---|
| 0 | Model loaded per camera |
| 1 | Model loaded for the entire container |
OCR detection mode
| Value | Behavior |
|---|---|
| 0 | First detection within ROI |
| 1 | Best detection selected from multiple OCR results |
Mode 1 is not recommended for small ROIs, where it may not perform well.
When everything is set, click Save.
Conclusion
The License Plate Recognition (LPR) application helps automate vehicle monitoring and number plate detection with configurable ROI settings, OCR optimization, and hardware acceleration options.
By properly configuring devices, ROIs, and meta parameters, users can achieve accurate and efficient license plate recognition for real-time monitoring applications.