Congestion Detection
Congestion Detection is used to detect and monitor vehicle congestion within a specified area.
This guide explains how to configure the Congestion Detection application in App Stack.
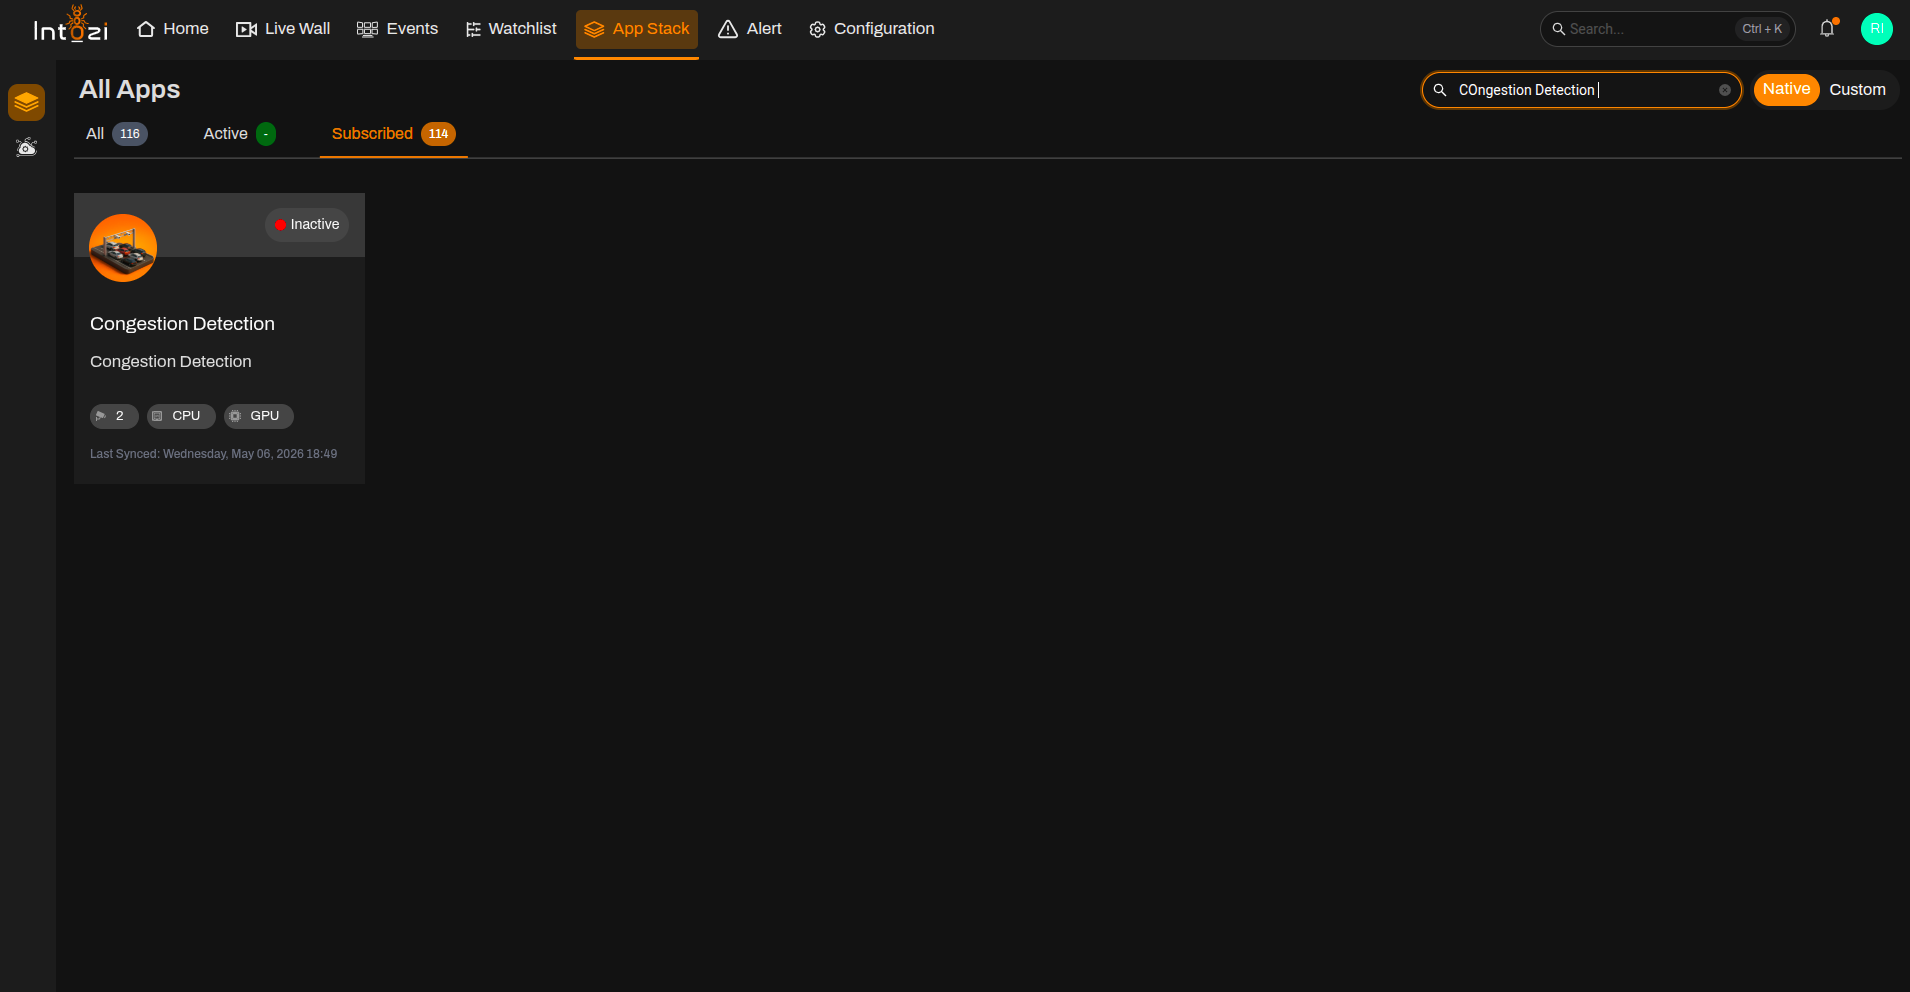
1. Finding the Congestion Detection Application in App Stack
- Open App Stack on the platform.
- Use the search bar (usually at the top right of the dashboard).
- Enter Congestion Detection.
- In the results, click once on the application to open it.
2. Device Configuration
After the application opens, you will be directed to the Device Configuration page.
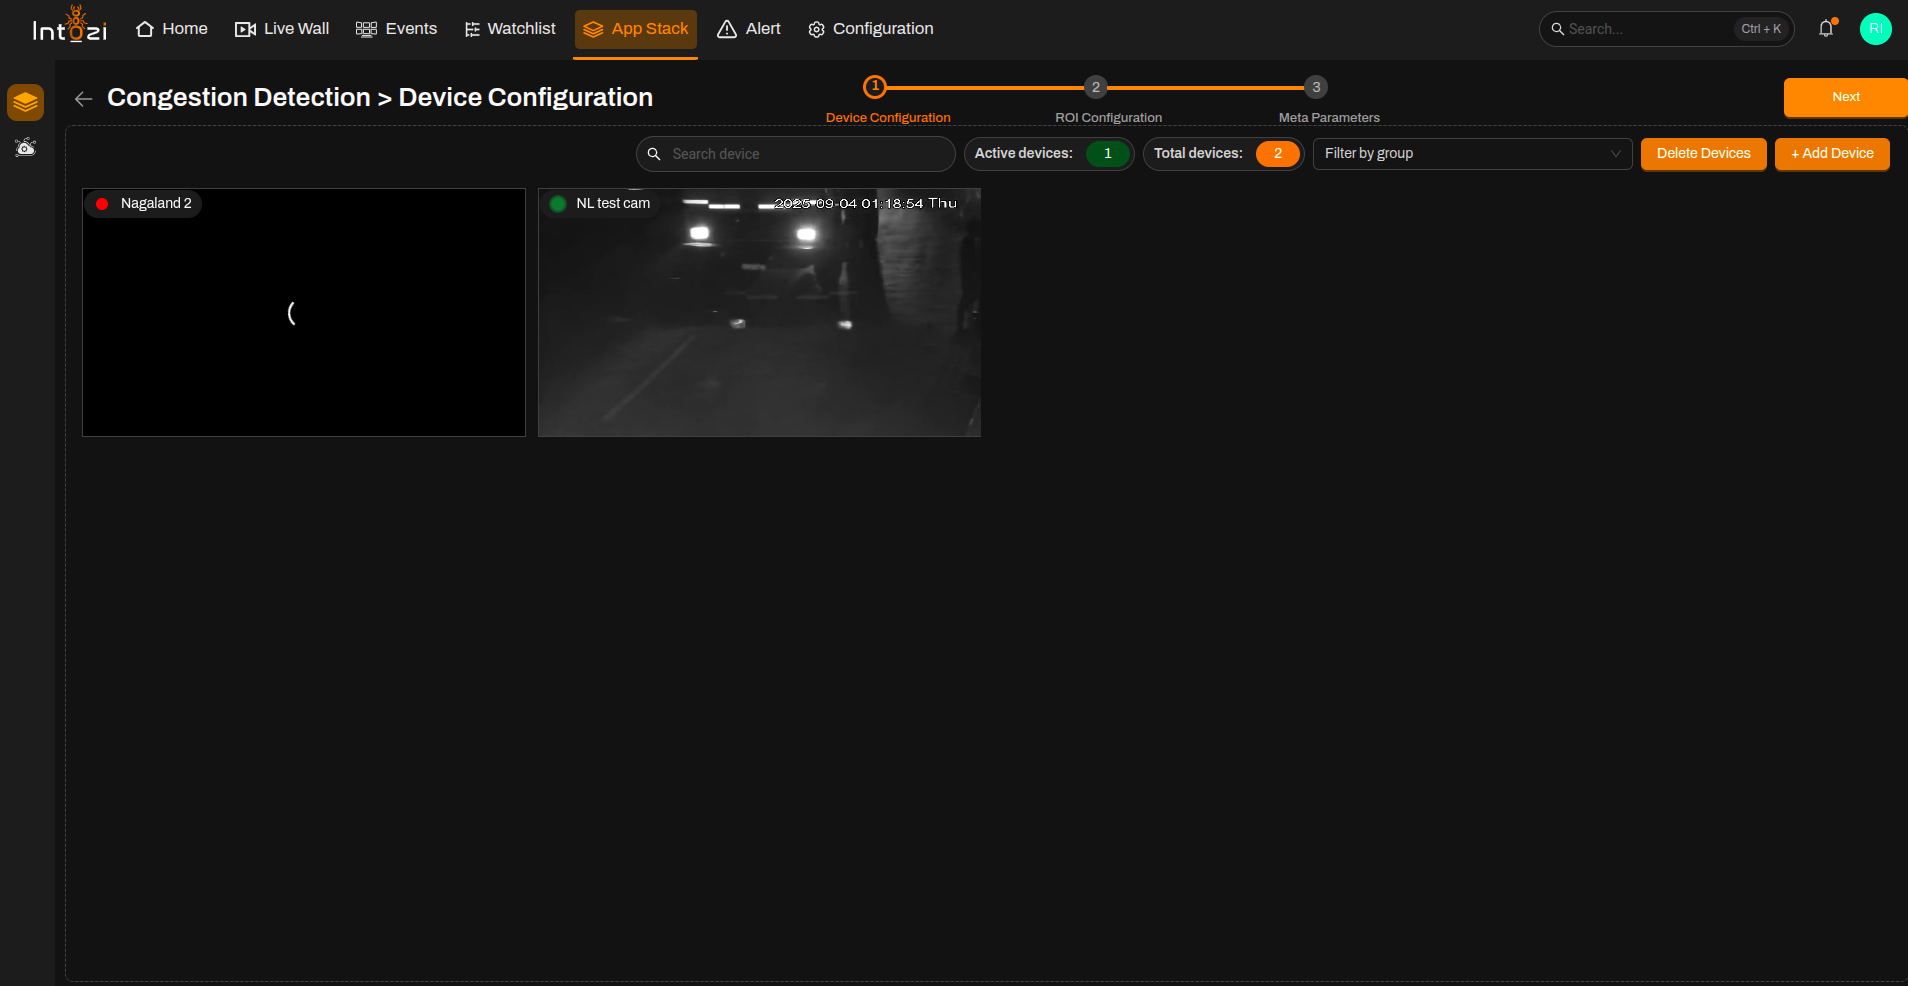
- On the right side of the page, click Add Device to add the required camera(s).
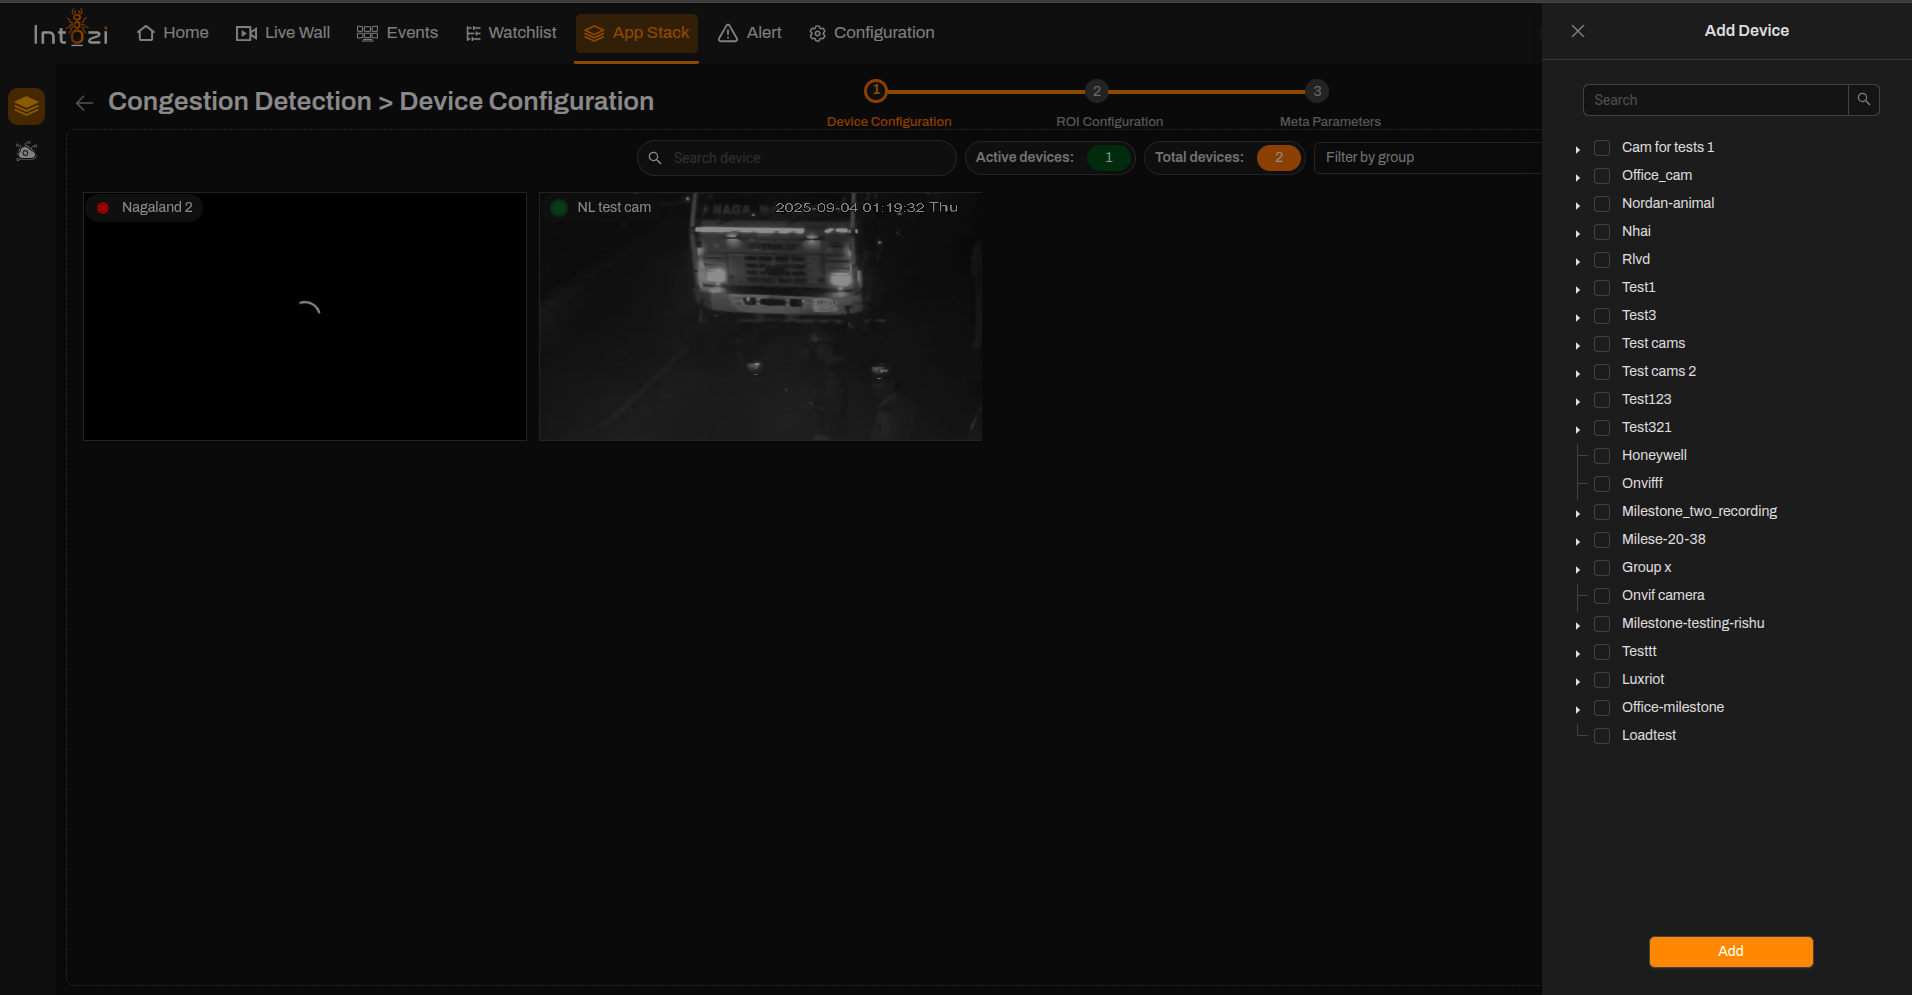
- Configure the required device settings.
- Once the devices are added, proceed to the ROI Configuration page.
Ensure all required cameras are added before proceeding to ROI configuration.
3. ROI (Region of Interest) Configuration
All added devices will be displayed on this page for ROI configuration.
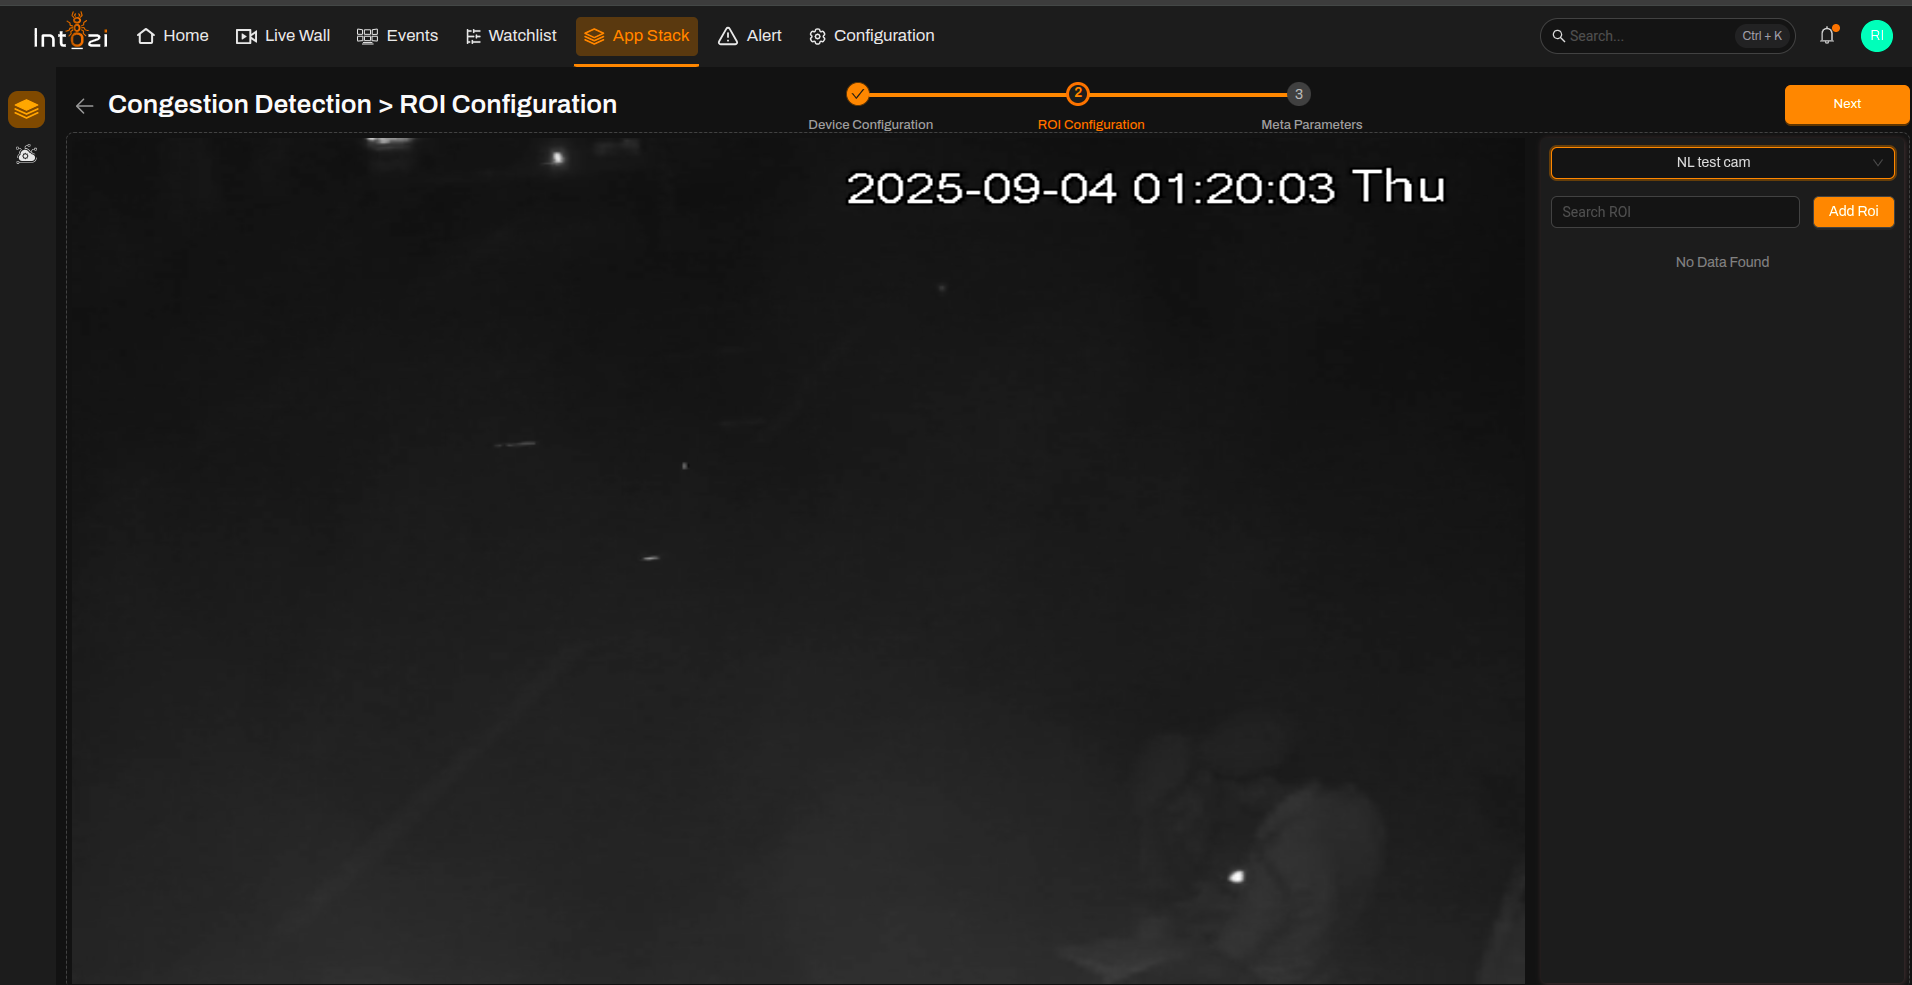
- Select the desired device.
- Click Add ROI (top right of the page).
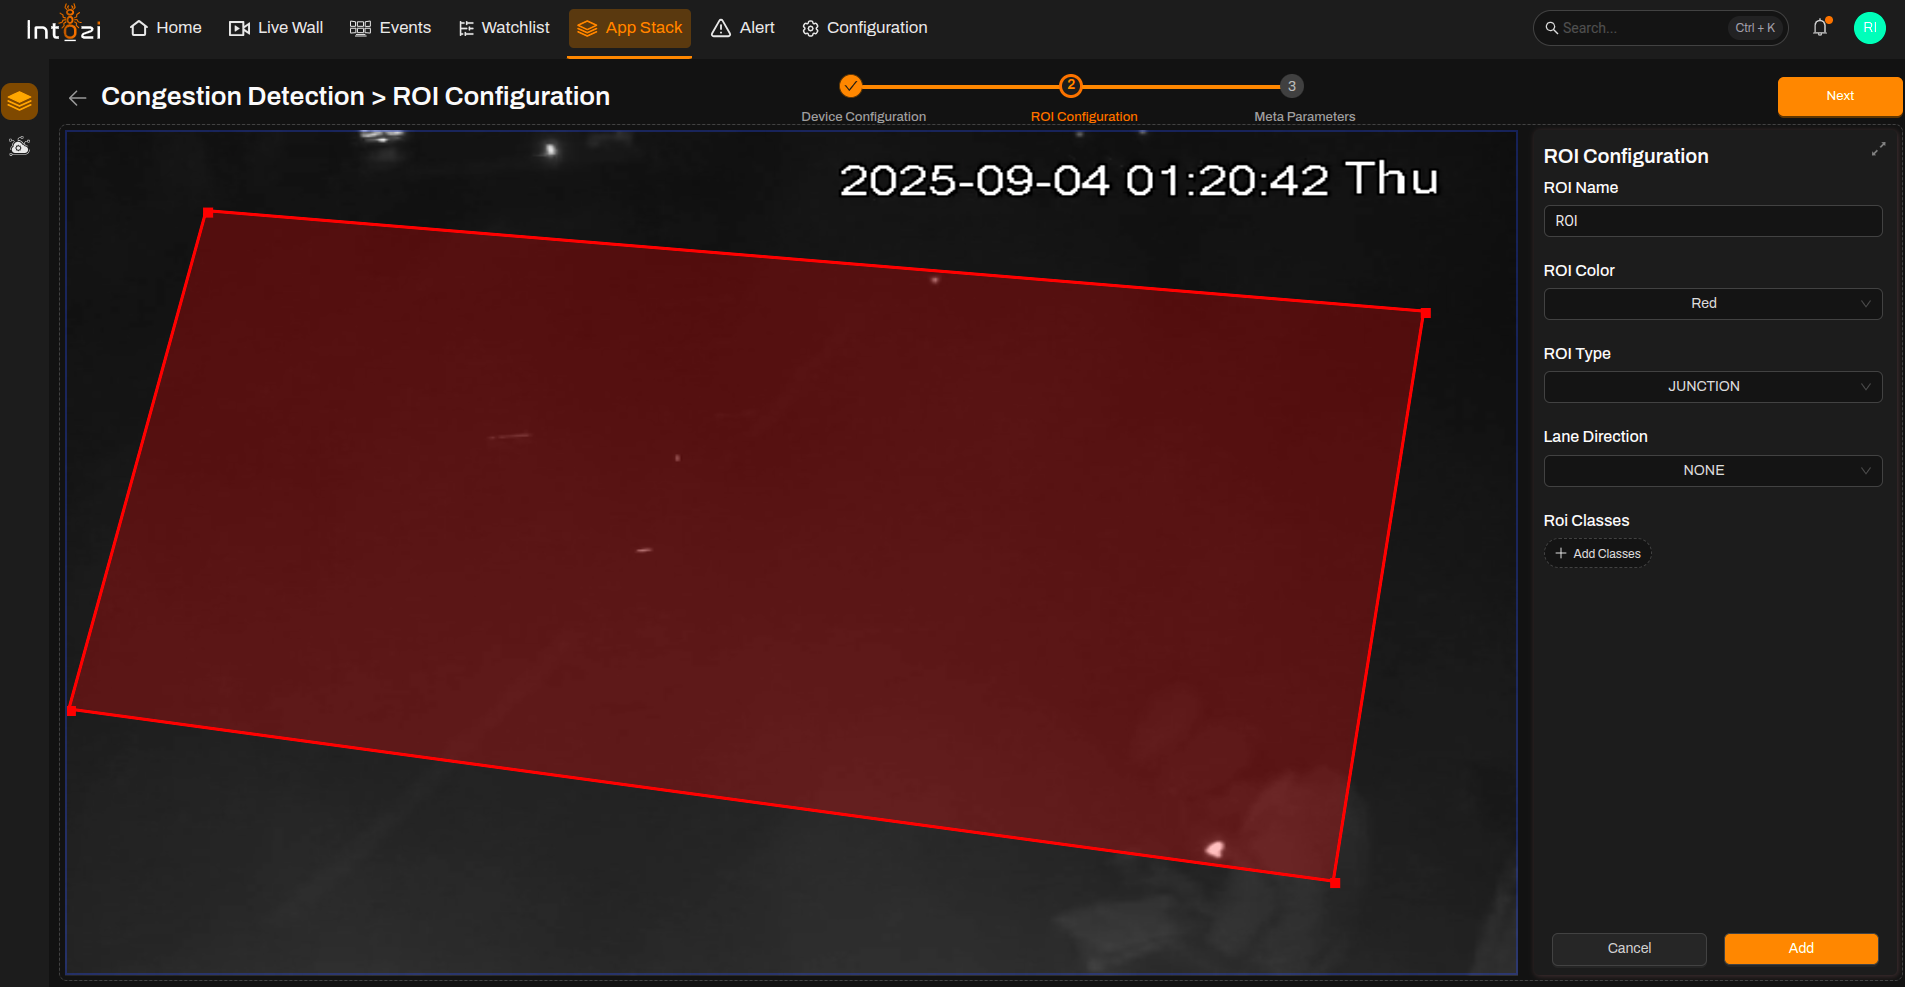
Fill in ROI Details
| Field | Guidance for Congestion Detection |
|---|---|
| ROI Name | Enter a meaningful name for the ROI. |
| ROI Color | Select a color for visualization. |
| ROI Type | Select Junction. |
| Lane Direction | Set to None. |
| ROI Classes | Not required. |
You can update or delete any ROI by selecting it and using the available options.
4. Meta Parameters Configuration
After ROI setup, navigate to the Meta Parameters page.
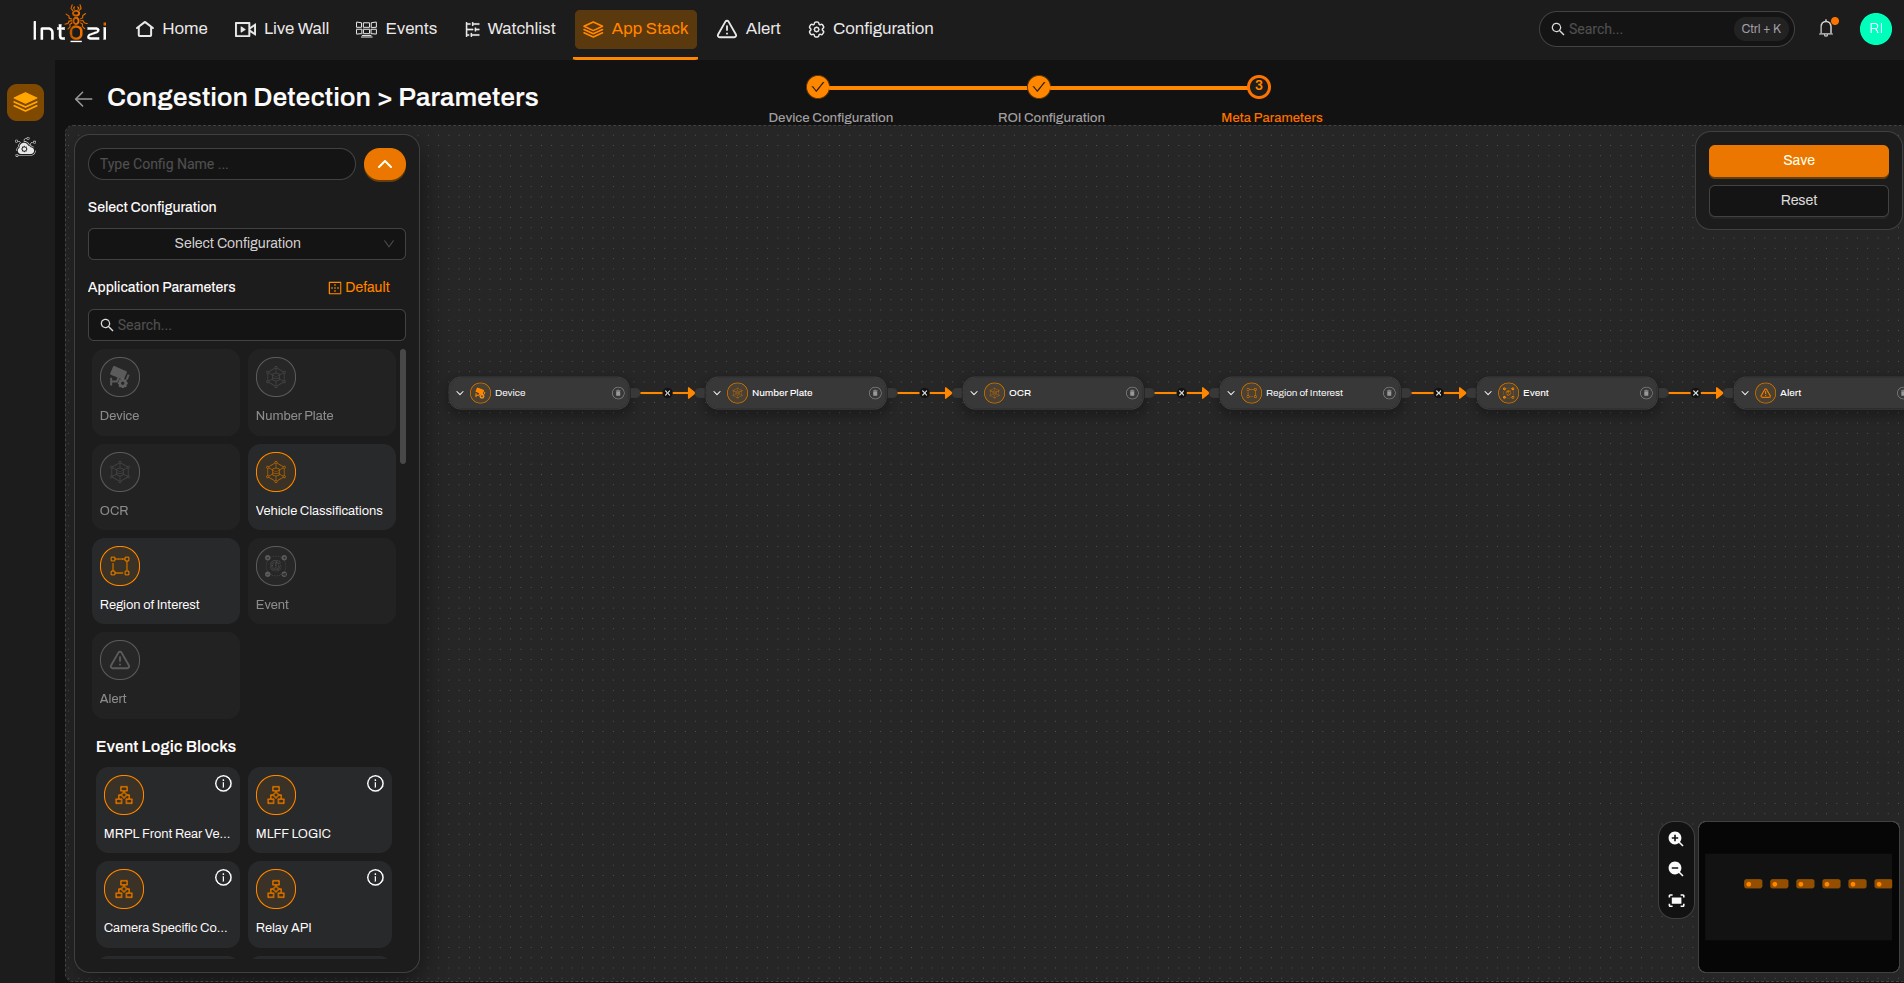
4.1 Default vs Custom Configuration
You can either:
- Use a default configuration, or
- Create a custom configuration.
Default Configuration Nodes
- Device
- Number Plate
- OCR
- Event
- Alert
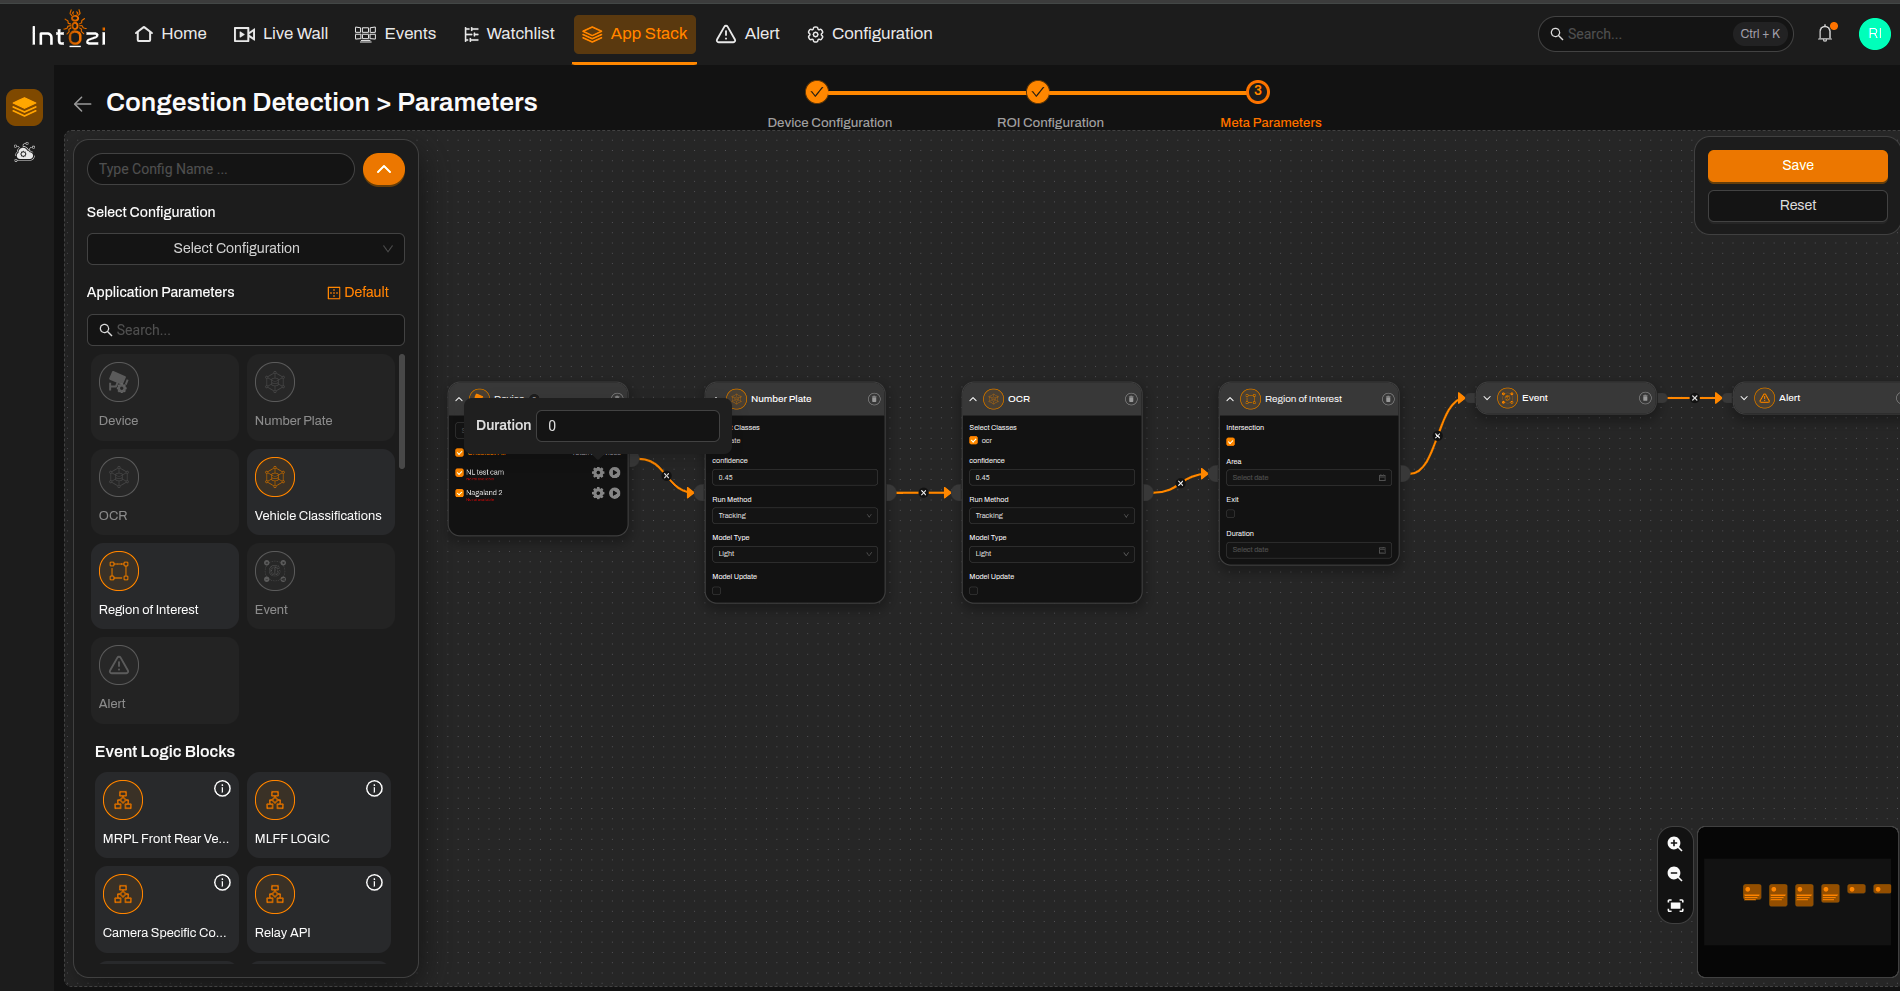
5. Device Node Settings
Select the required device and configure the following settings.
Duration
- Defines the time interval (in seconds) after which a new event can be generated.
- Configure this value according to project requirements.
Adjust the Duration parameter according to the desired frequency of congestion event generation.
6. Number Plate Node Settings
Confidence Threshold
- Default value: 0.45
- Can be adjusted according to:
- Camera angle
- Lighting conditions
- Vehicle speed
- Deployment requirements
Higher confidence values reduce false detections, while lower values may improve detection rates in challenging environments.
7. OCR Node Settings
Confidence Threshold
- Default value: 0.45
- Can be adjusted according to:
- Image quality
- Camera field of view
- Plate visibility
- Deployment requirements
OCR confidence should be tuned based on camera placement and license plate readability.
8. Final Configuration
After configuring the required settings:
- Enter a Configuration Name.
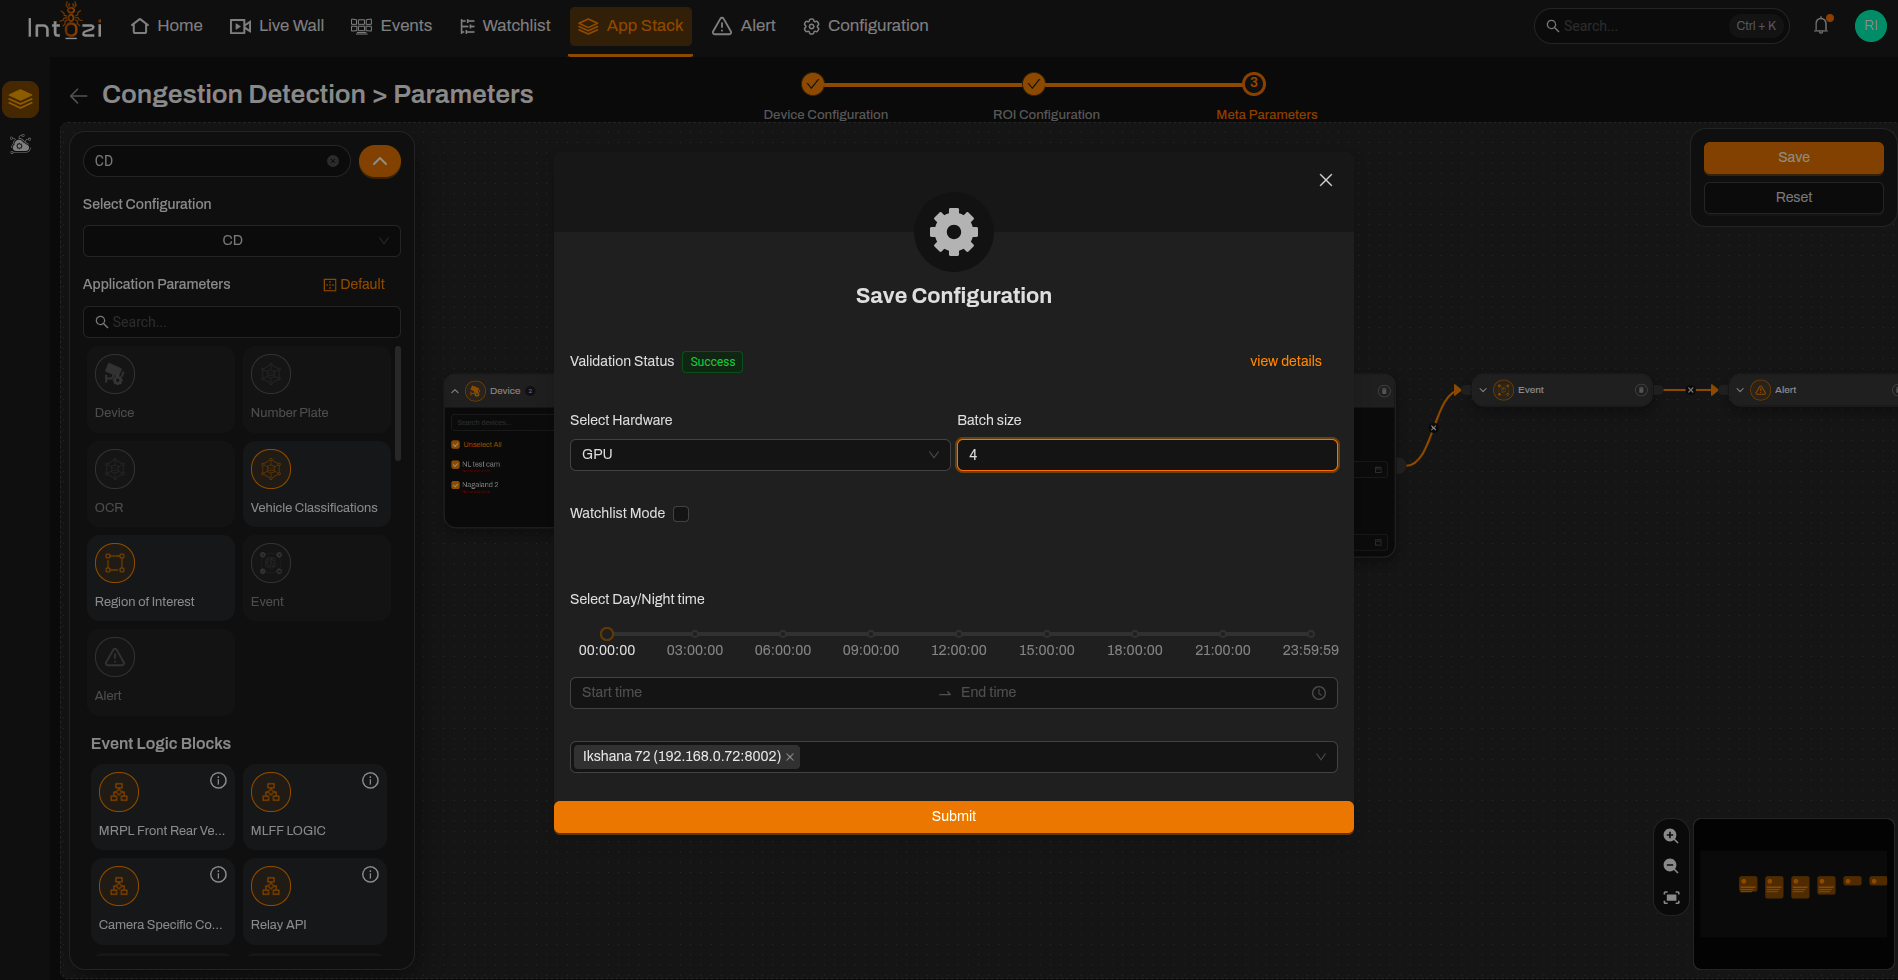
- Select the hardware type:
- CPU
- GPU
- Configure the Batch Size as recommended by the Development/CV Team.
- Select the appropriate Analytics Server.
9. Saving the Configuration
After verifying all settings:
- Confirm device selection.
- Verify ROI placement.
- Review Duration settings.
- Verify Number Plate confidence threshold.
- Verify OCR confidence threshold.
- Confirm Analytics Server selection.
- Verify hardware and batch size configuration.
Click Save Configuration to activate the deployment.
Conclusion
The Congestion Detection application helps monitor vehicle congestion levels within designated areas and enables proactive traffic management through automated event generation.
By properly configuring ROI placement, confidence thresholds, and processing parameters, users can achieve reliable congestion monitoring and timely event generation for traffic management operations.